My Top 5 Staging Hacks

One of the beautiful things about gaining experience, particularly years and years of it, is the inevitable fact that you will pick up hacks along the way that will hopefully save 3 valuable things–time, energy and money! An additional perk of gaining such knowledge is the freedom to share it with others. So I am going to do just that!
Although difficult to narrow down my go-to staging hacks, the 5 that I find myself using quite often are as follows:
1 & 2. Using Black Spray Paint & Rust-Oleum on the Fireplace
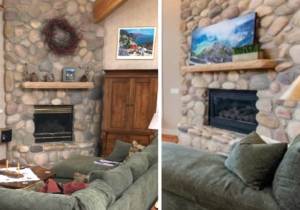 As I have said several times in the past, when staging a home you want to give potential buyers as few objections as possible. Meaning if the fireplace looks “used” and covered with soot, this can cause a distraction and take away from the beauty of the house. By simply applying a coat of high-heat black spray paint to the interior of the fireplace, it will eliminate the fireplace as a whole, from being a possible eyesore. You can also use Rust-Oleum on the gold trim that often lines old fireplaces. By doing these two things, you will give a main focal piece in your home a much-needed refresh.
3. Pillow Hacks
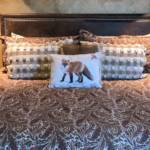 Being resourceful can only help you as a stager. Therefore, when you are trying to finish up a job and realize that you are short one pillow, I have a few tips for you. If you have ample plastic bags at your disposal, they are a great trick to stuff standard-sized shams, making they appear full and upright. If it is a king-sized pillow you are looking for, two standard pillows can easily be stuffed into the king-sized sham. The photo below is an example of both hacks.
4. Sharpies on Nails
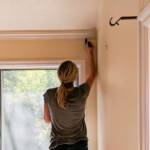 After pouring hours and hours into a staging job, it is normal to want everything to be perfect, or as close to perfect as possible. In a recent staging, redesign and decorating class I held, we were doing the final touches and hanging up curtains in our last room before our big reveal to the client. Although the room and curtains looked perfect, I could not help but notice that the screws we used to hang up the curtains were all that I could see. Some may argue that only I would note those screws but I am willing to bet that a picky homeowner or an interested potential buyer could most definitely be distracted by the shiny silver screws in our dark brown curtain rods. Therefore, we simply took a sharpie and colored over the tacky color of the screw. Voilà!
5. Hang-O-Matic
This tool is a n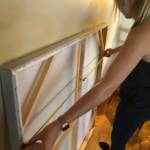 ew love of mine. Although I have hung hundreds, if not thousands of pictures without it, I now have made the Hang-O-Matic a staple item in my toolbox. This tool is especially helpful for art that is oversized, heavy or has difficult hanging options on the back. Your individual tape measures, levels and pencils are a thing of the past, now being replaced by this all-in-one gizmo.
Hopefully these hacks taught you something you didn’t know before. There are a million other things I have learned along the way and I am confident that as your career continues, you will add to my growing list.